In honor of the holiday yesterday, I thought I'd share the invitations that I DIY'd in 2010 for our wedding! My inspiration came from a really old invitation catalog that my mom had; I unfortunately don't know where it went off to. I do remember that the original invitations were the same shape, had a black outer covering and were French themed.
Charles and I met in Italy on a study abroad trip while we were both attending A&M, so it holds a pretty special place in both of our hearts. When we started planning the wedding I knew that I wanted to incorporate little bits of Italy into the decor and the invitations were one of the ways that I took advantage of the theme.
I liked the size/shape of the invites because they were unique to other wedding invitations I had seen and could fit into a standard size (4.125"x9.25") #10 envelope, which means there was more customization flexibility.
I went with a deep red for the envelopes, which I found online at Action Envelope. I picked the square flap in garnet and instead of paying to have the return address printed, I just set up a template in Word and did it on my home printer. That step alone saved me about $60 and it was super easy.
The invitation is a 9"x8" base that folds over into a 9"x4" card. Inside is the actual invitation part, attached to the lower half, and two postcards held by a red ribbon on the upper half.
I got all of these printed on 8.5"x11" card stock at Office Max and they did a fantastic job. The guy I worked with was very knowledgeable and a huge help. I chose off-white card stock for the outer bit, which remained plain on the inside and had a printed vintage map of Italy on the exterior that I bought off of iStock photo. The invitation part (8"x3") I created in Photoshop to look older, so I had those printed - 3 to a sheet - on regular white card stock. In a stroke of luck, the same company I bought the envelopes from also sold plain 80 lb card stock in coordinating colors, and - at 8.5"x11" - was the exact right width to give me a border around the invitation. All I had to do was cut it into 3.5" sections and I had an instant mat!
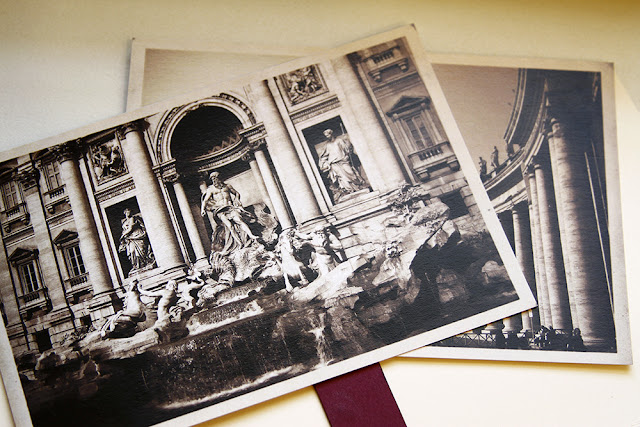
The postcards (5.75"x3.75") I also created in Photoshop out of two photos that I took during our semester in Italy. I manipulated them to resemble vintage Italian post cards and on the back they held more information for the wedding, including the RSVP that was pre-stamped and easy to drop in the mail.
For the exterior stamps, I used the King and Queen of Hearts set from the post office that I thought were adorable, went well enough with my vintage-y theme, and didn't scream wedding!
Things that were invaluable during this process:
- Making Memories Paper Trimmer
- Martha Stewart bone folder (this will save your thumbnail from so much pain!)
- Glue tape
I don't have a complete cost breakdown but I believe the overall cost was roughly $500, which brings it to about $5 per invitation, and that includes postage. So while it's certainly not the cheapest option out there, it was definitely less expensive than buying a completely customized invite from someone else, and I was able to include all of the information that I thought was important. No regrets!
In nursery news, my darling husband primed the two walls that we're painting the Plumage color on his day off on Monday, and we should have the rest of the room painted by the weekend...update to follow!


0 comments:
Post a Comment